


Maternity photographers really do make magic happen. We learn how to work with our clients’ unique needs and photo goals, how to work with our spaces, and how to turn a beautiful photo into a truly great one. But if you think a maternity photo is perfect in one shot, I have some exciting insider secrets for you. Almost all photographers use “tricks” to create the perfect staged photo. Whether that’s adjusting the lighting on the set, taking multiple shots for composites, or even using Photoshop to edit in a little magic, a lot of work goes into the before, during and after. I talked about this a little bit in this blog about studio newborn photography. Now, I thought I’d show a little insight into the befores and afters at studio maternity photoshoots.
Setting the Stage For Your Maternity Photo
Studio maternity photos look elegant, poised, and well-put together in the final product. But if these photos below showcase anything, it’s that there’s a lot going on on the set that gets cut out of the picture after editing. Take the simple backgrounds I use in many of my photos. I utilize a common photography set tool: an interchangeable background system. If you’re a fan of any reality TV show that has contestants taking photos or headshots, you’ve likely seen one of these.

Having a simple sheet system with different colored sheets of canvas, fabric, or paper allows me to offer clientele different backgrounds for their photos. As you can see, a lot of the set behind the backgrounds is still visible in the photo I take.

After taking the photo, I utilize Photoshop to (among other things) remove the bits of the background we don’t want.
I don’t just edit out the background and end there, though. I also do things like tweak the lighting and contrast. You can really see that in this photo:

Photoshop Tricks Heighten The Magic
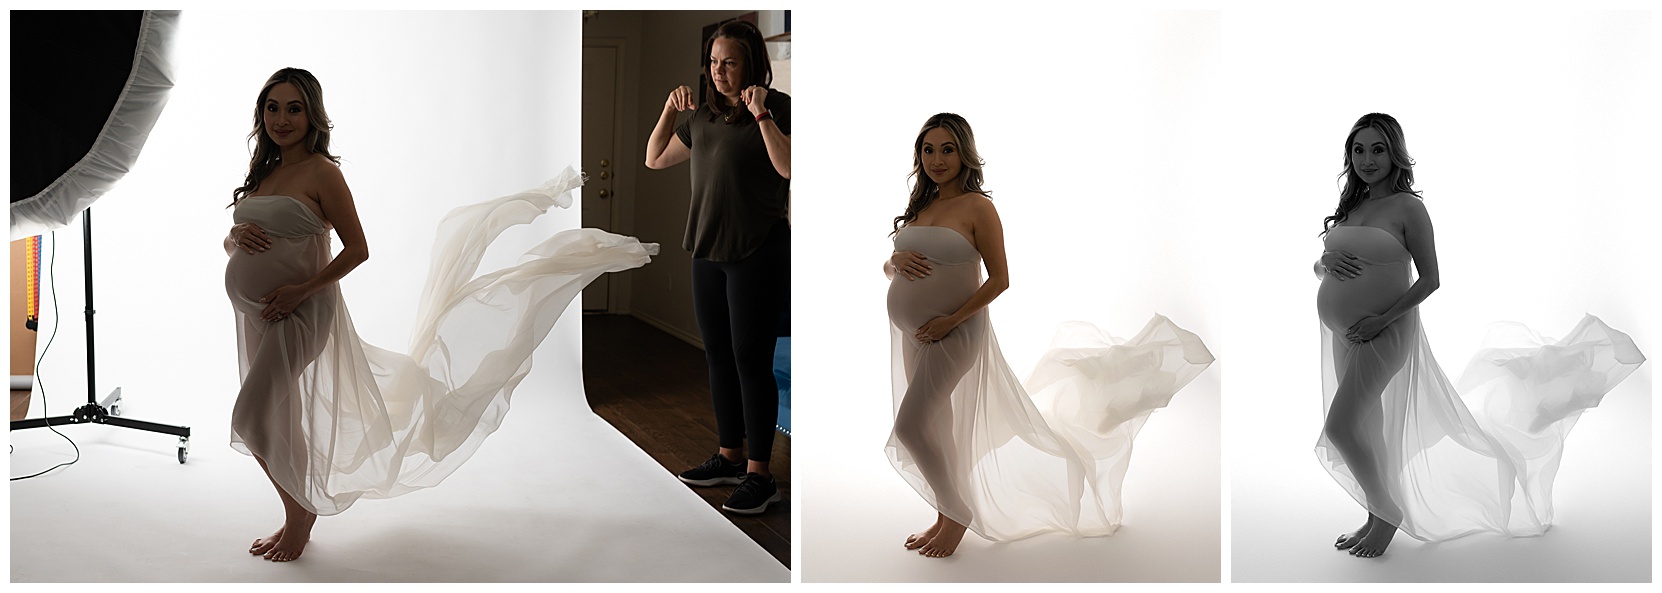
There are also some other tweaks I do post-photoshoot. Some of those are displayed pretty nicely in this set of three photos below. Can you spot the differences in her train between the unedited shot and the last two shots?
If you caught that the fabric in is folded up differently in these two shots, it’s because you’re right! Although these are technically the same photo, I did some extra editing to give this photo the right amount of movement in the last two versions. This edit also made the folds look much more interesting in the black and white photo.
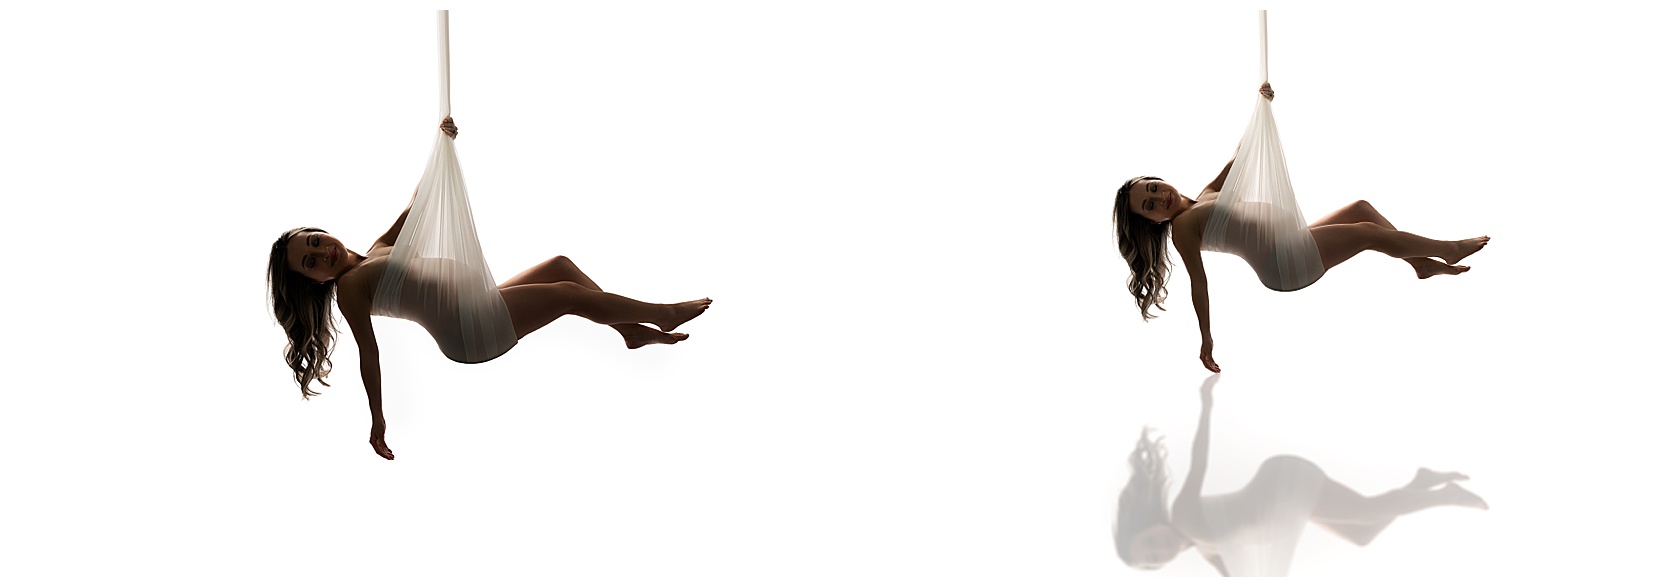
Photoshop also lets me get those really great shots where you can suspend belief for a moment and really imagine something magical happening in the photos. For instance, in the photo above, I had this woman sitting on something that I edited out after the shot. She wasn’t actually suspended in air! Then, I added in this fun reflection after the fact. It looks like she’s suspended over a pool of water.
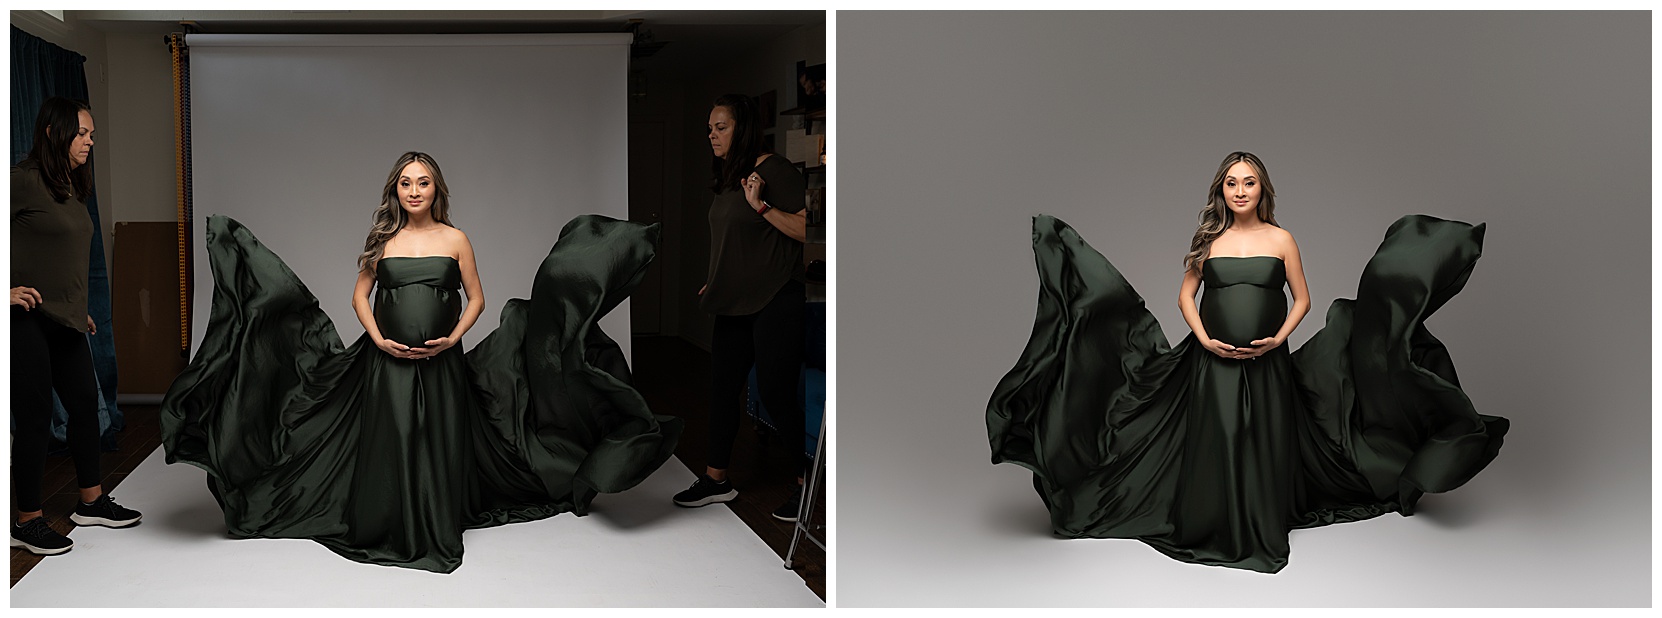
Photographers also use composites — where we take many photos and edit the best elements of them together afterward. You can see that really well in the photo above. That’s not twin train-throwing assistants you see there. That is the same woman throwing this maternity client’s gown trains. I edited the two shots together and took out the unwanted set parts in the background of the photo to create the final product you see on the right.
Want to learn more about my process? Please be sure to check out my blog archive, where I have done many articles about what happens behind the scenes at Hello Photography.


