


Studio newborn photography is a lot of fun! All parents of newborns know that handling newborns is a very delicate task. So, as an observer of newborn photos, you might be wondering how on earth we get them posed for certain shots. I promise as a mom and a photographer committed to the safety of all newborns I photograph: babies are safe during complex newborn poses in my studio.
Safety first, always. As an Austin newborn photographer with hundreds of newborn sessions behind the camera, I’ll walk you through exactly how this pose works.
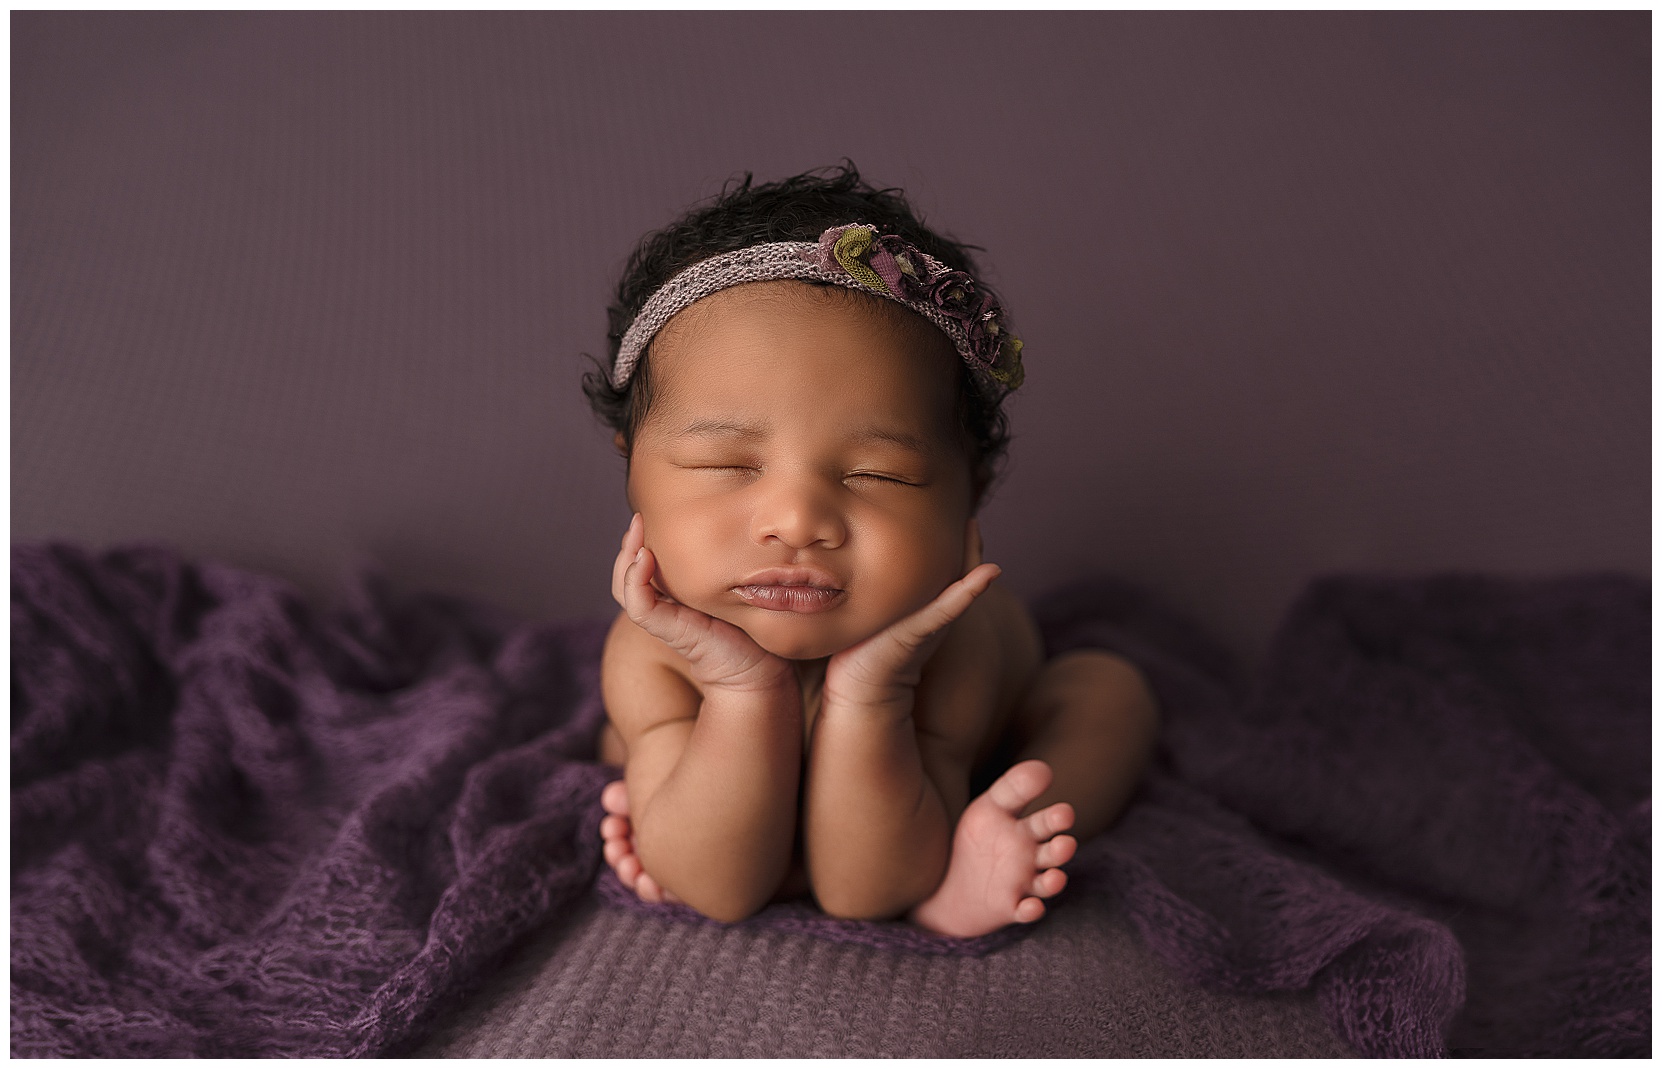
To explain, let me walk you through the beloved froggy pose so often used by newborn photographers.
Studio Newborn Photography Using The Froggy Pose
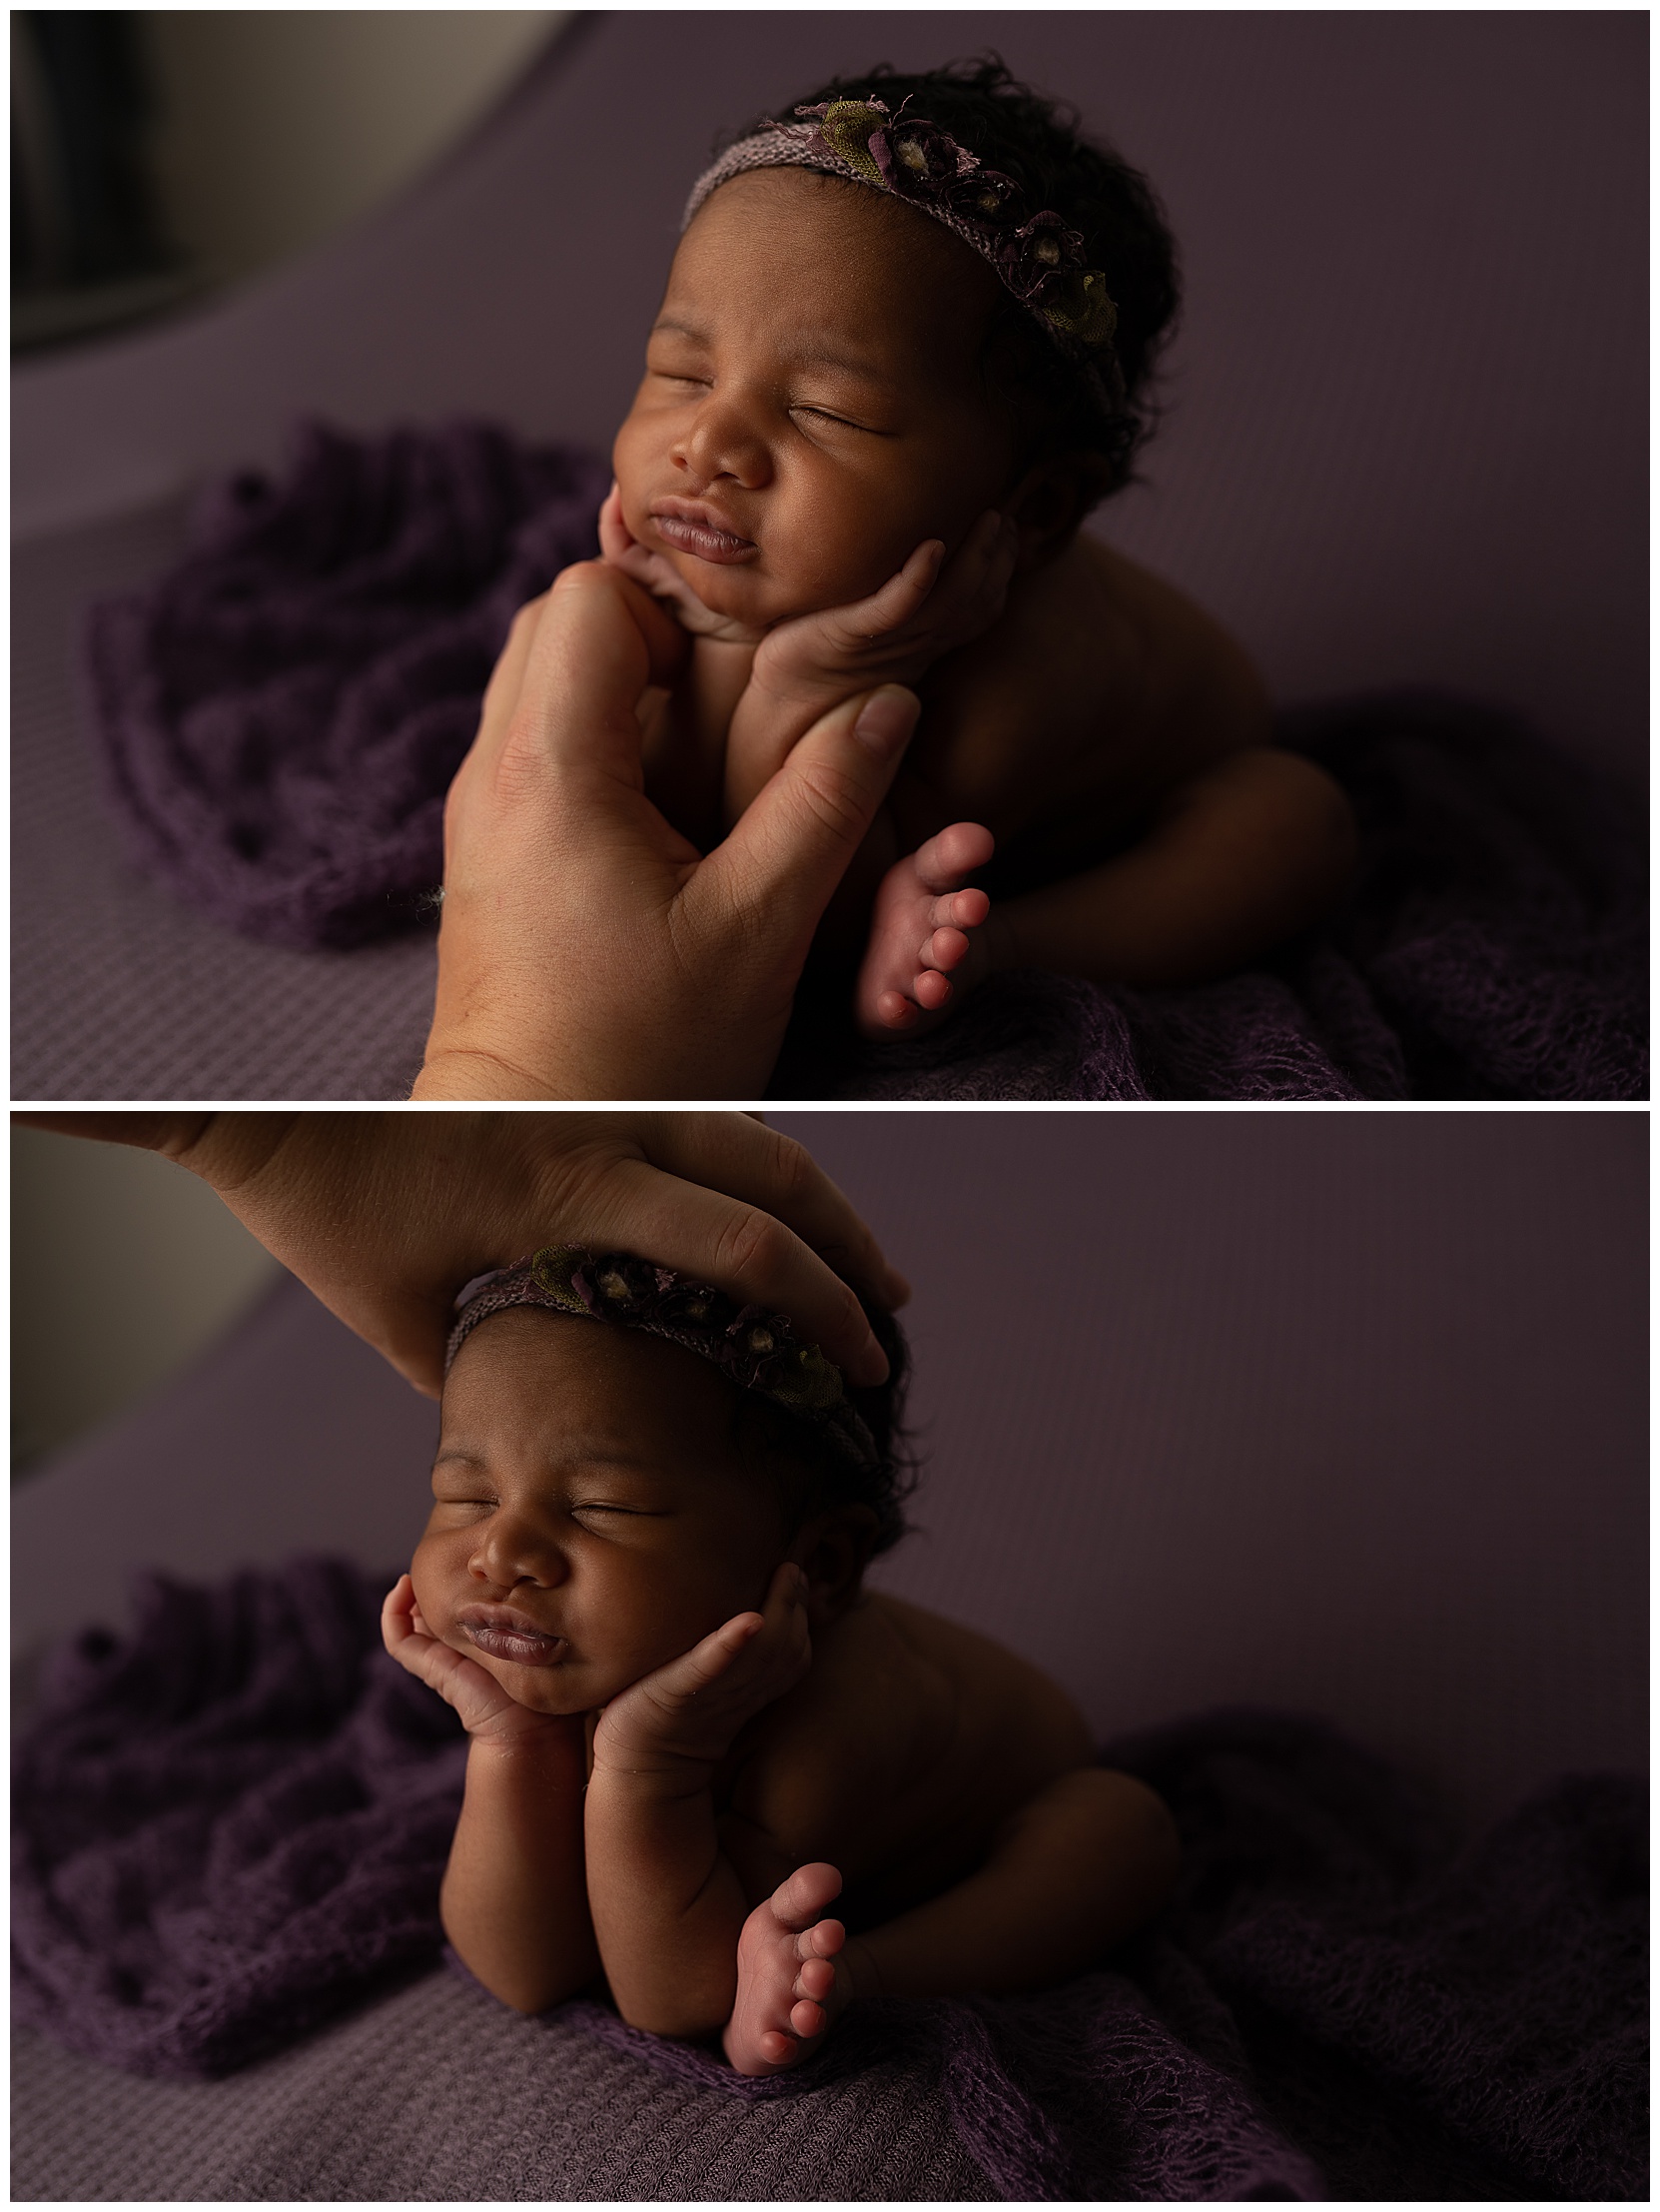
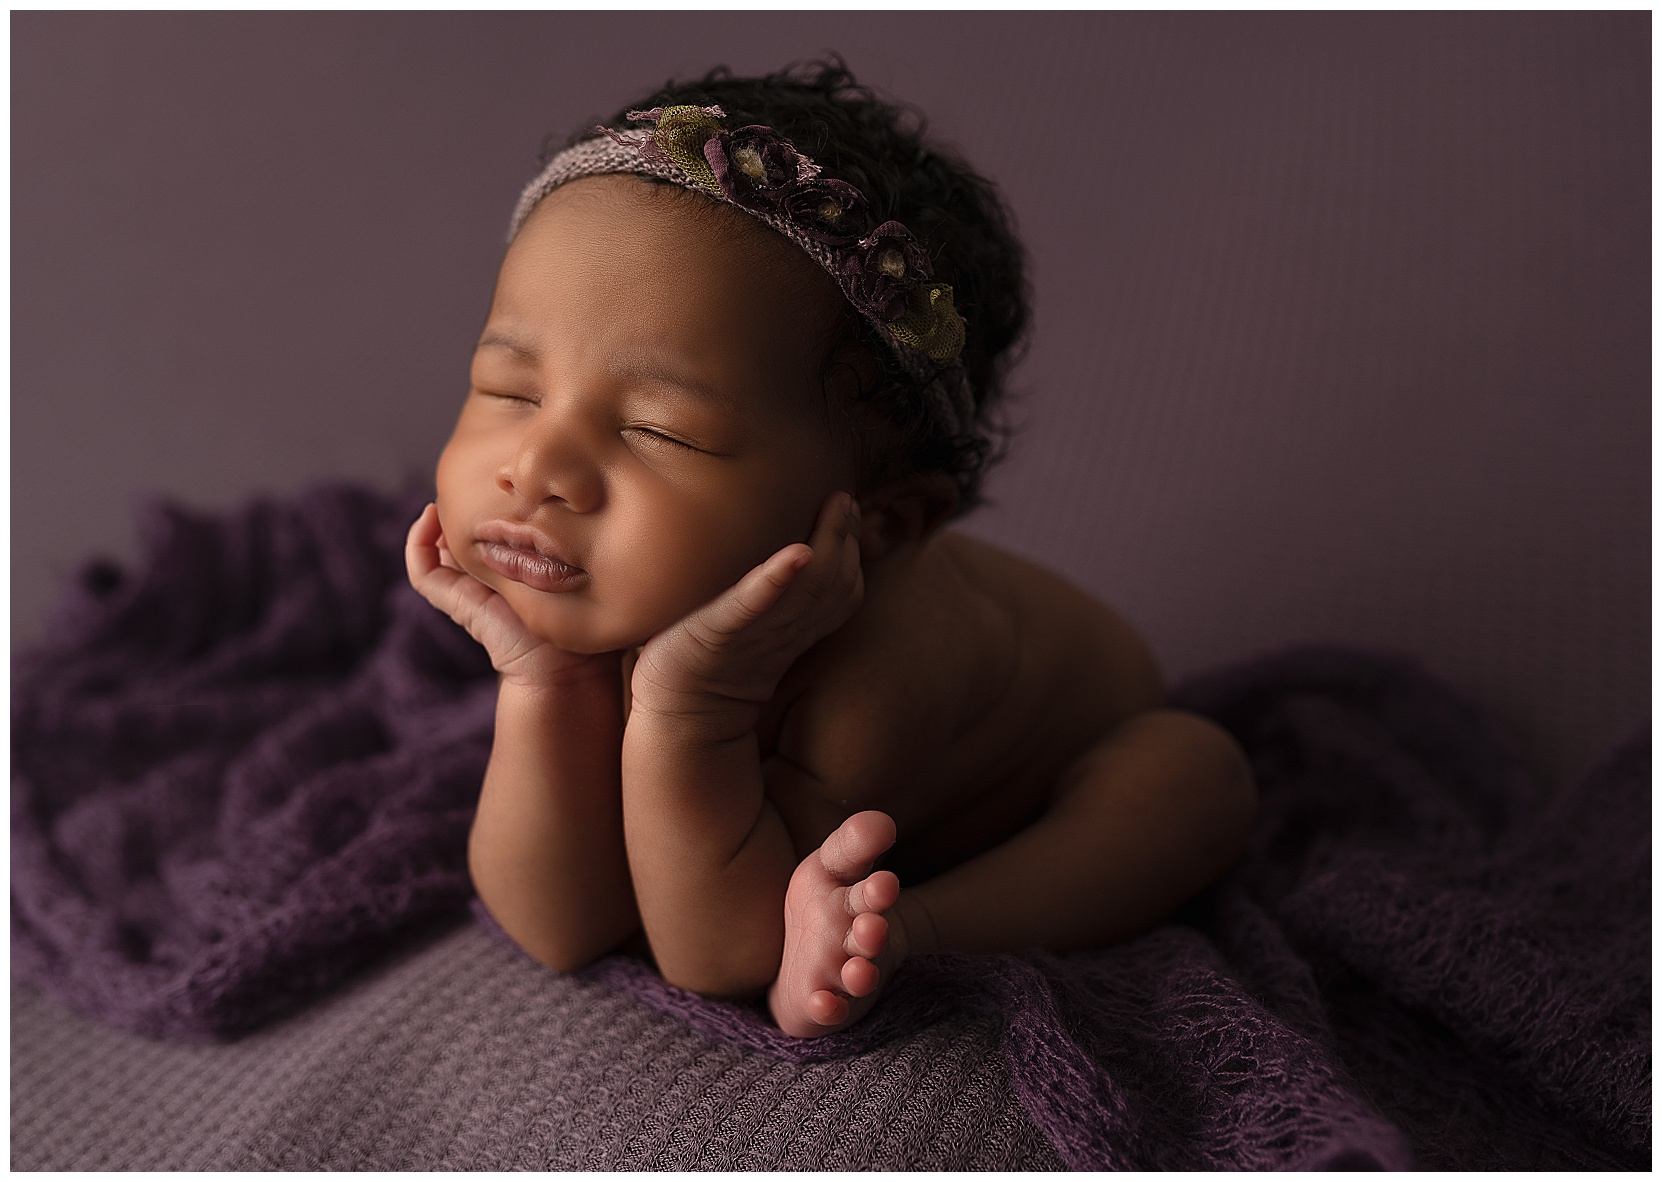
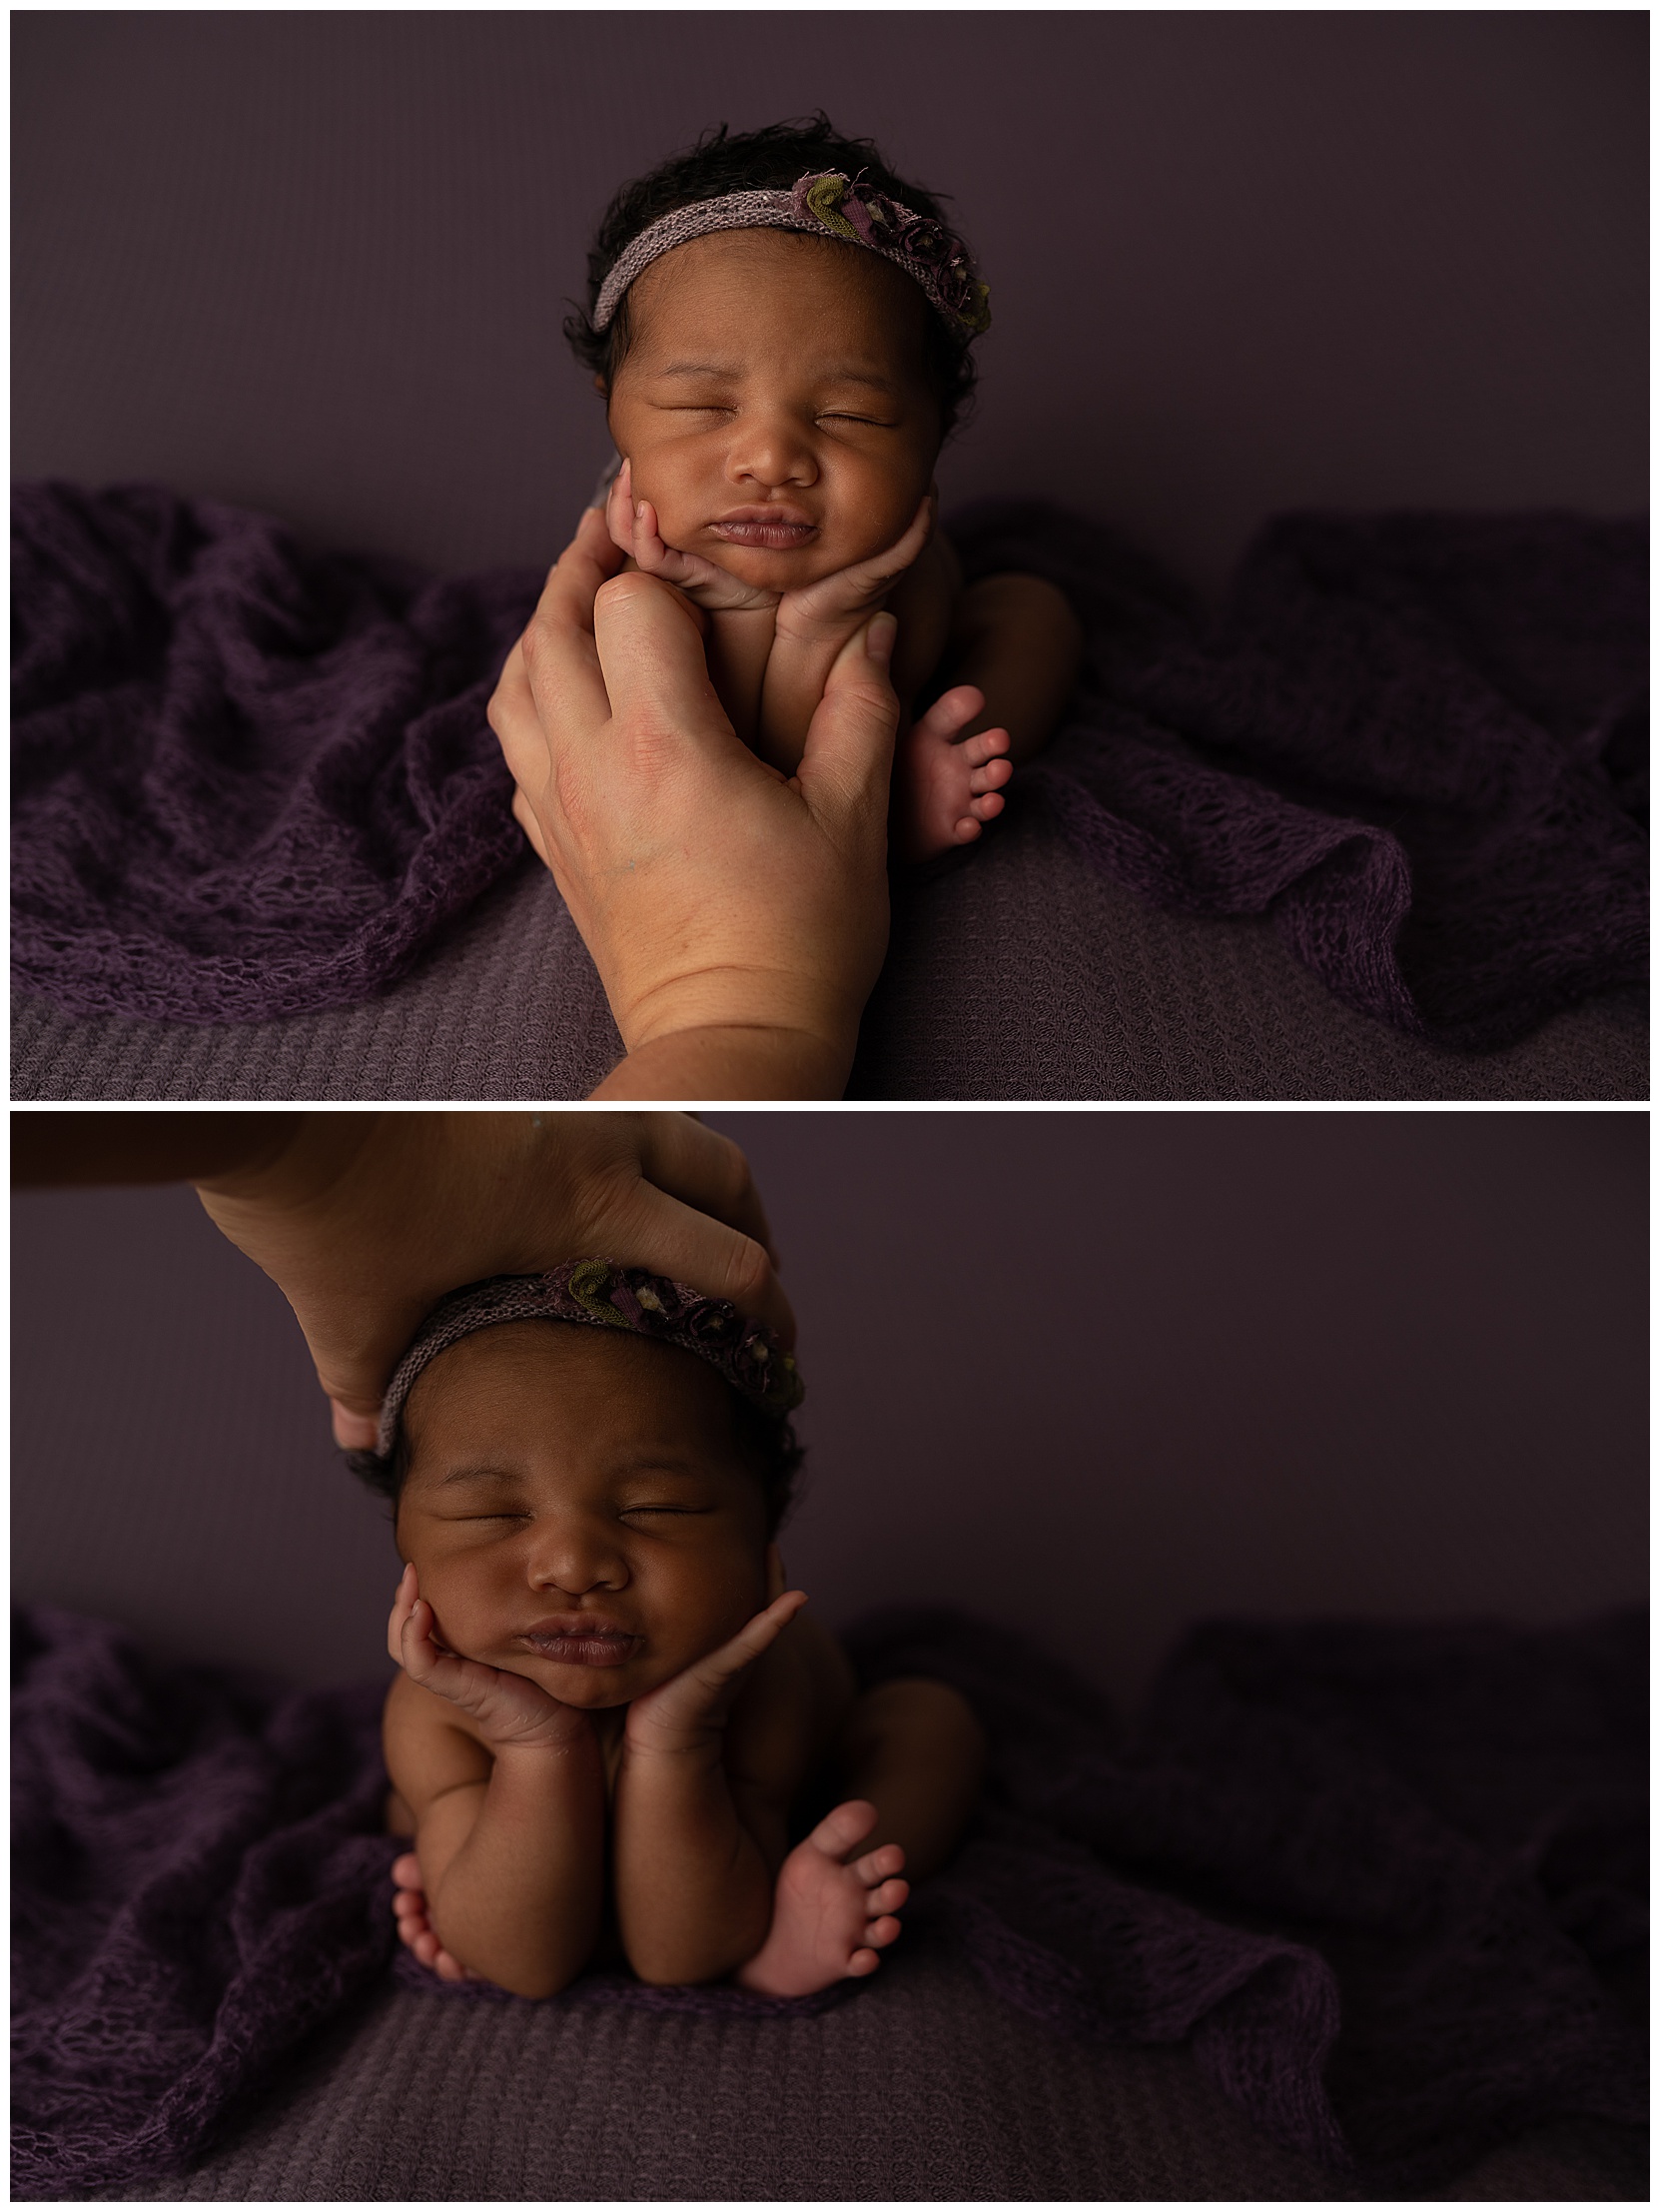
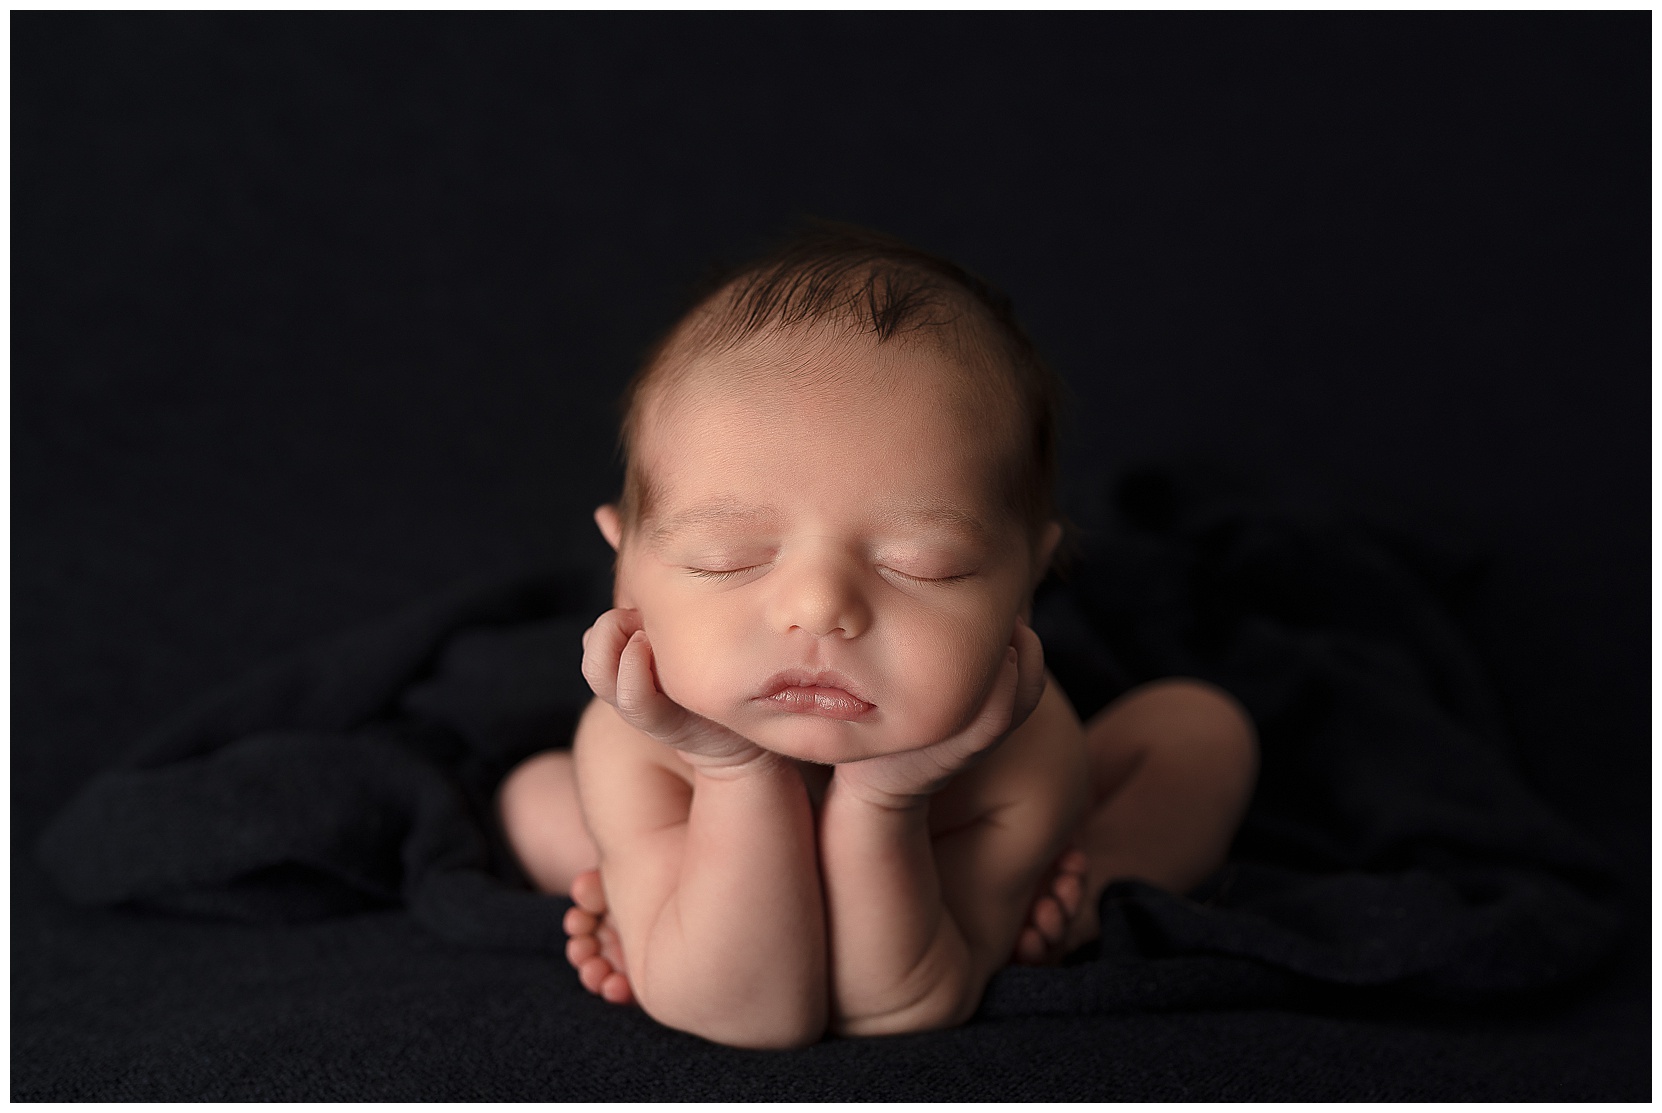
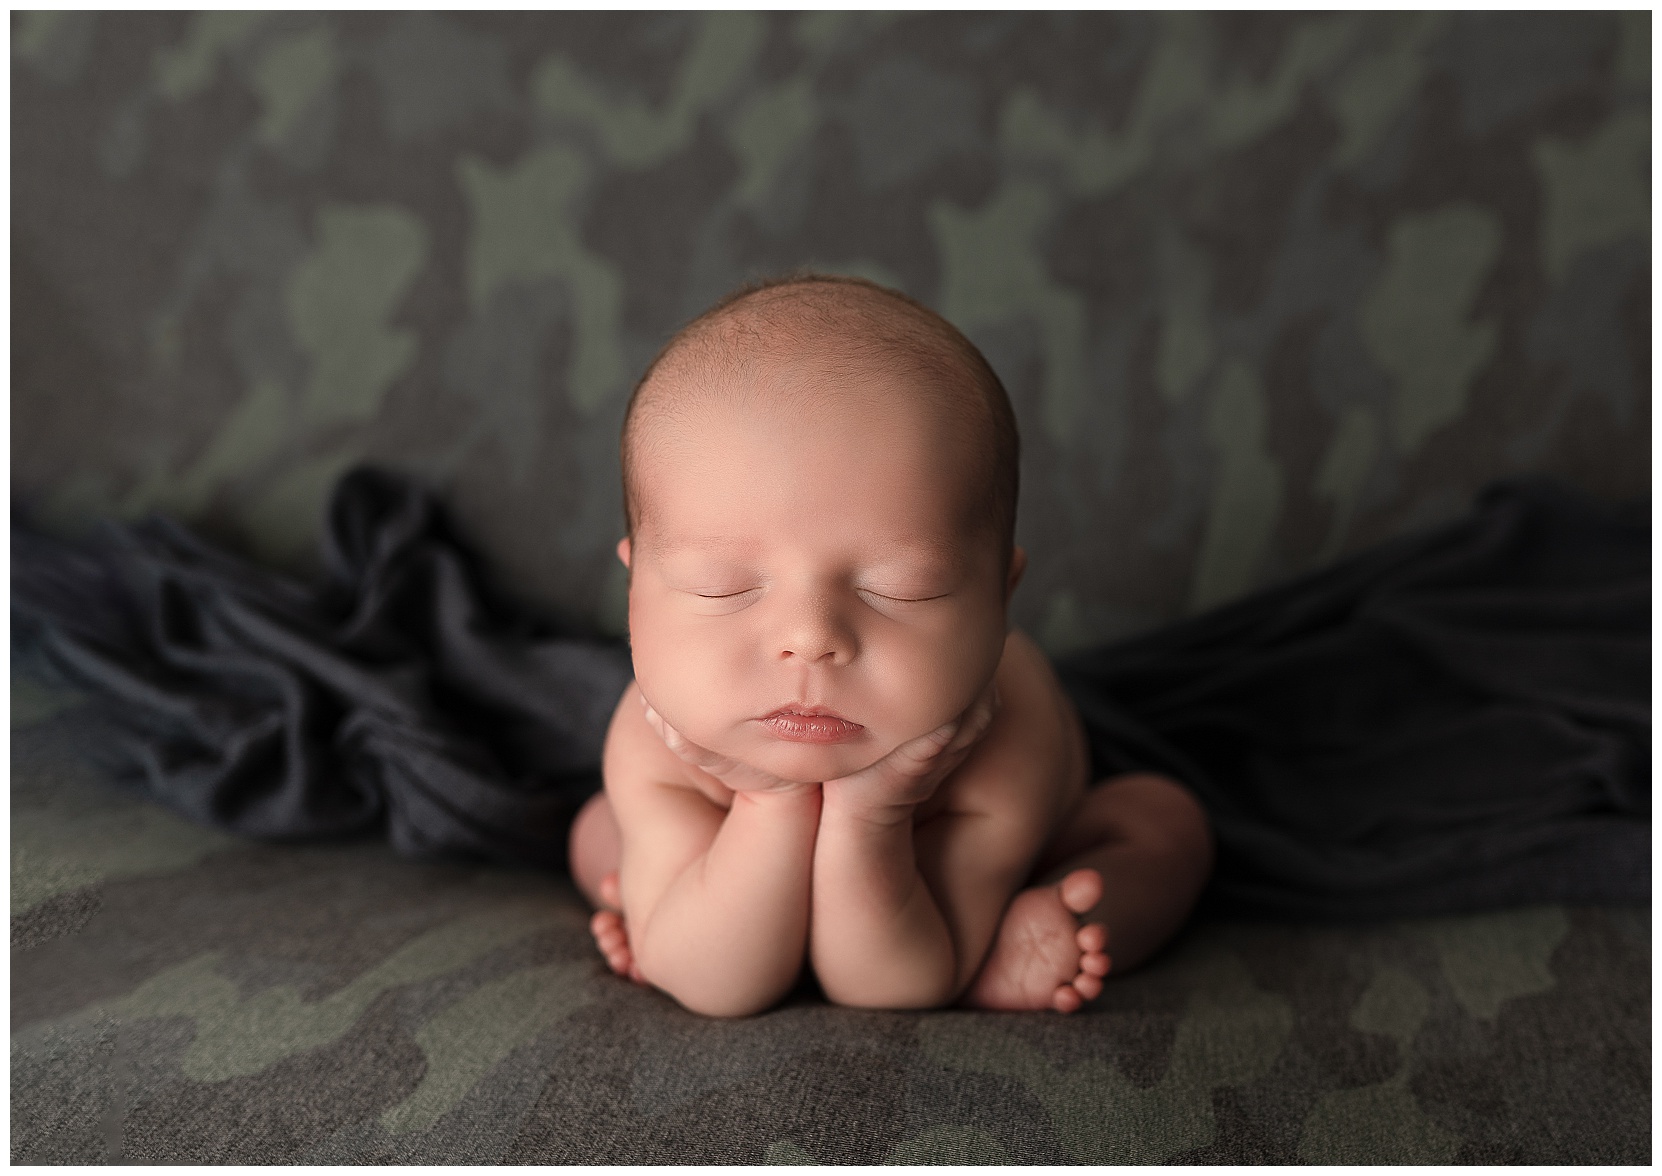
Newborn photographers use the froggy pose to showcase some of the cutest features of your newborn. It brings those sweet newborn fingers, toes, and cheekies front row center. Despite what it looks like, baby is not free-floating and supporting themselves in these shots. The froggy pose is a type of composite photography, meaning I compile two or more photos to create a final image. That way, I never have my hands off baby, and they’re supported at all times!
With this little one, I first supported her bottom half and took a photo with a clear shot of her face and the top of her head. Next, I supported the top of her head and got a clear shot of the bottom half of her body. I’ll talk more later about other support methods I use, but here are the two photos:
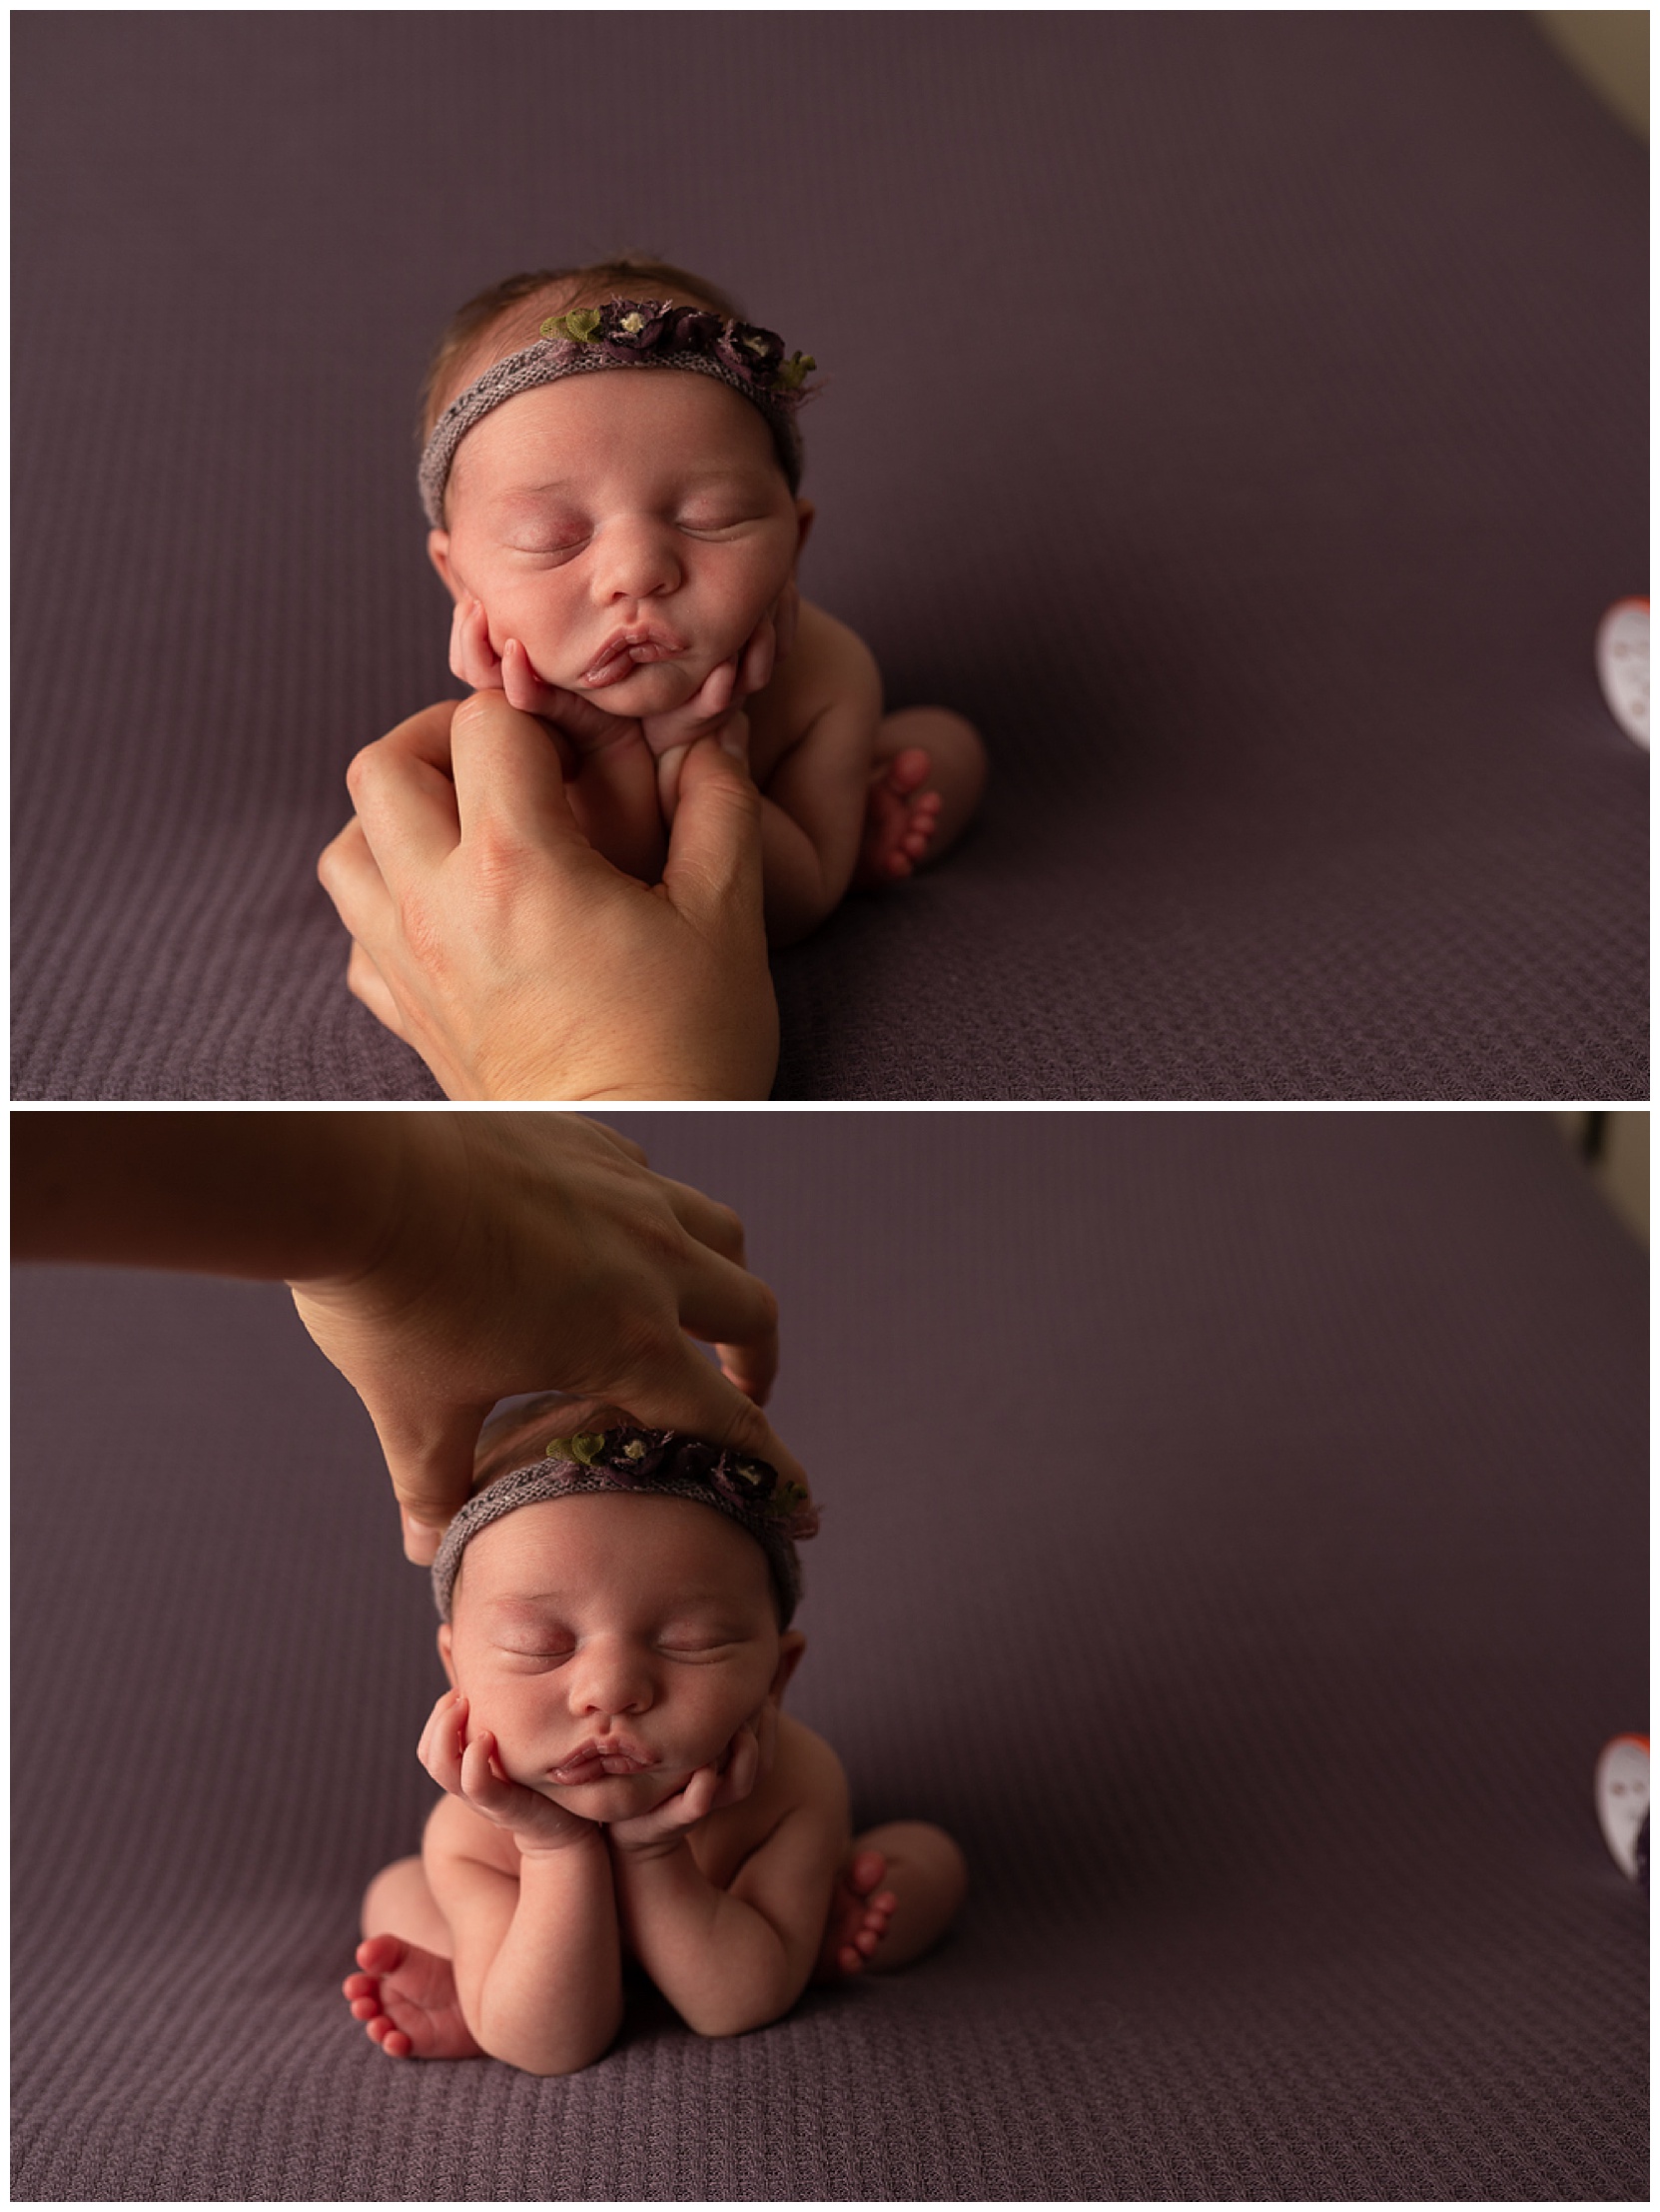
After I take the photos, I photoshop the two together to create a seamless photo. The video embedded below shows how I did this with this little one’s photos.
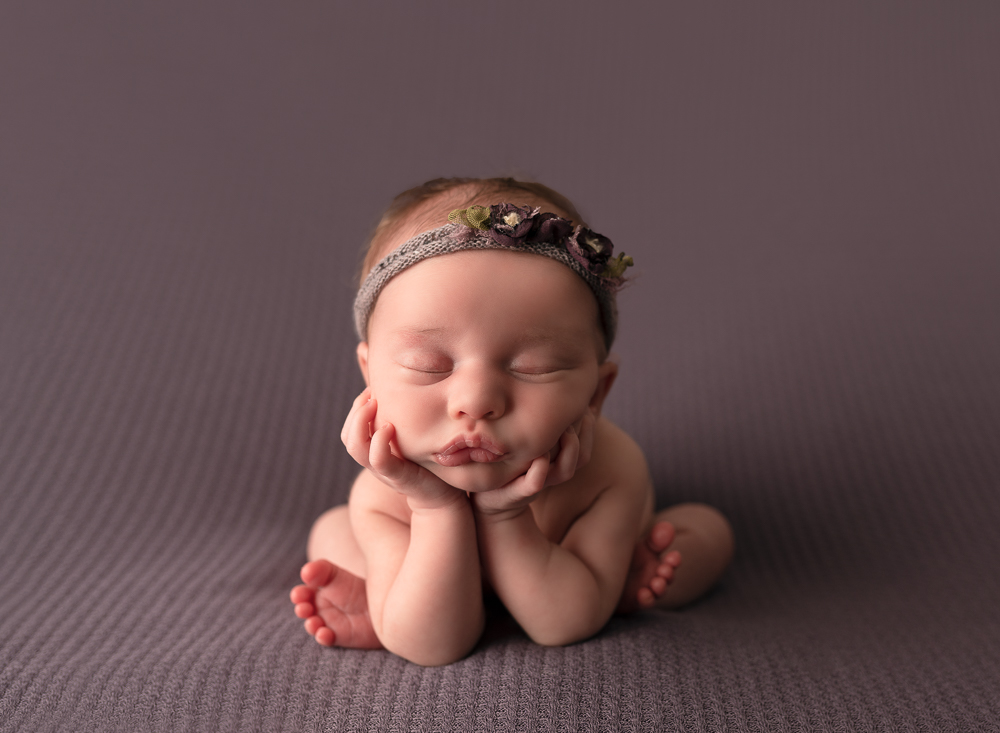
Here’s what her final froggy pose looked like after all the editing was done. Pretty cute, right?
How I Support Baby Throughout
There’s a lot more that goes into this pose than just me holding baby’s head and lower body. Behind the scenes, props, photographers, and parents are hard at work!
First, I set up supports underneath layers of blanket and foam to keep baby safe and secure throughout the shot. This allows me to position their butt lower than their feet, so they are comfortably leaning forward and not in danger of rocking backward.
For extra safety, the baby’s elbows must be secure in front of their feet, giving the most support to their head. Since babies cannot hold their heads up on their own until they are a few months old, this will protect their heads and neck and keep them comfortable. Photographers should place their hands supportively underneath their chin, and be careful not to pinch any of their neck rolls in the process!
Before taking the photo, baby should be stable, with their head resting comfortably on their hands. This is for their protection as well as an aid for the photographer. When the photographer switches hands to get the other composite photo, this ensures baby doesn’t lean to one side and make editing harder.
I usually do this setup on my own. For the most part, babies are very cooperative and quiet during this pose (I’ll explain later why). However, I occasionally enlist the help of parents for posing babies.
If it does come down to asking for a parent’s help, I may ask for dad over mom. This is because, during the froggy pose, babies should ideally be asleep.
A fun piece of baby trivia. Babies can smell their moms when they are asleep. Mom smell = dinner bell, so if mom gets too close to a sleeping baby, they might wake up thinking it’s time to eat!
Newborn Froggy Pose Aesthetics
Newborn photographers make specific aesthetic choices during the froggy pose.
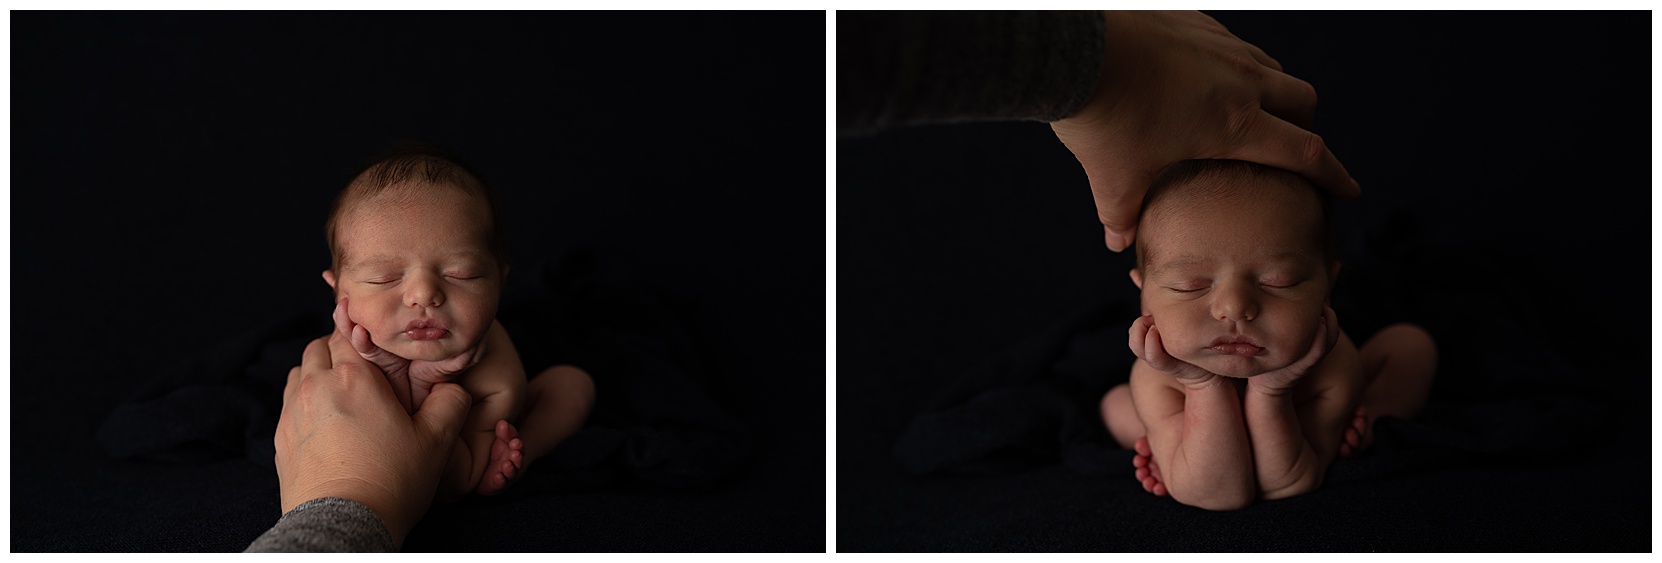
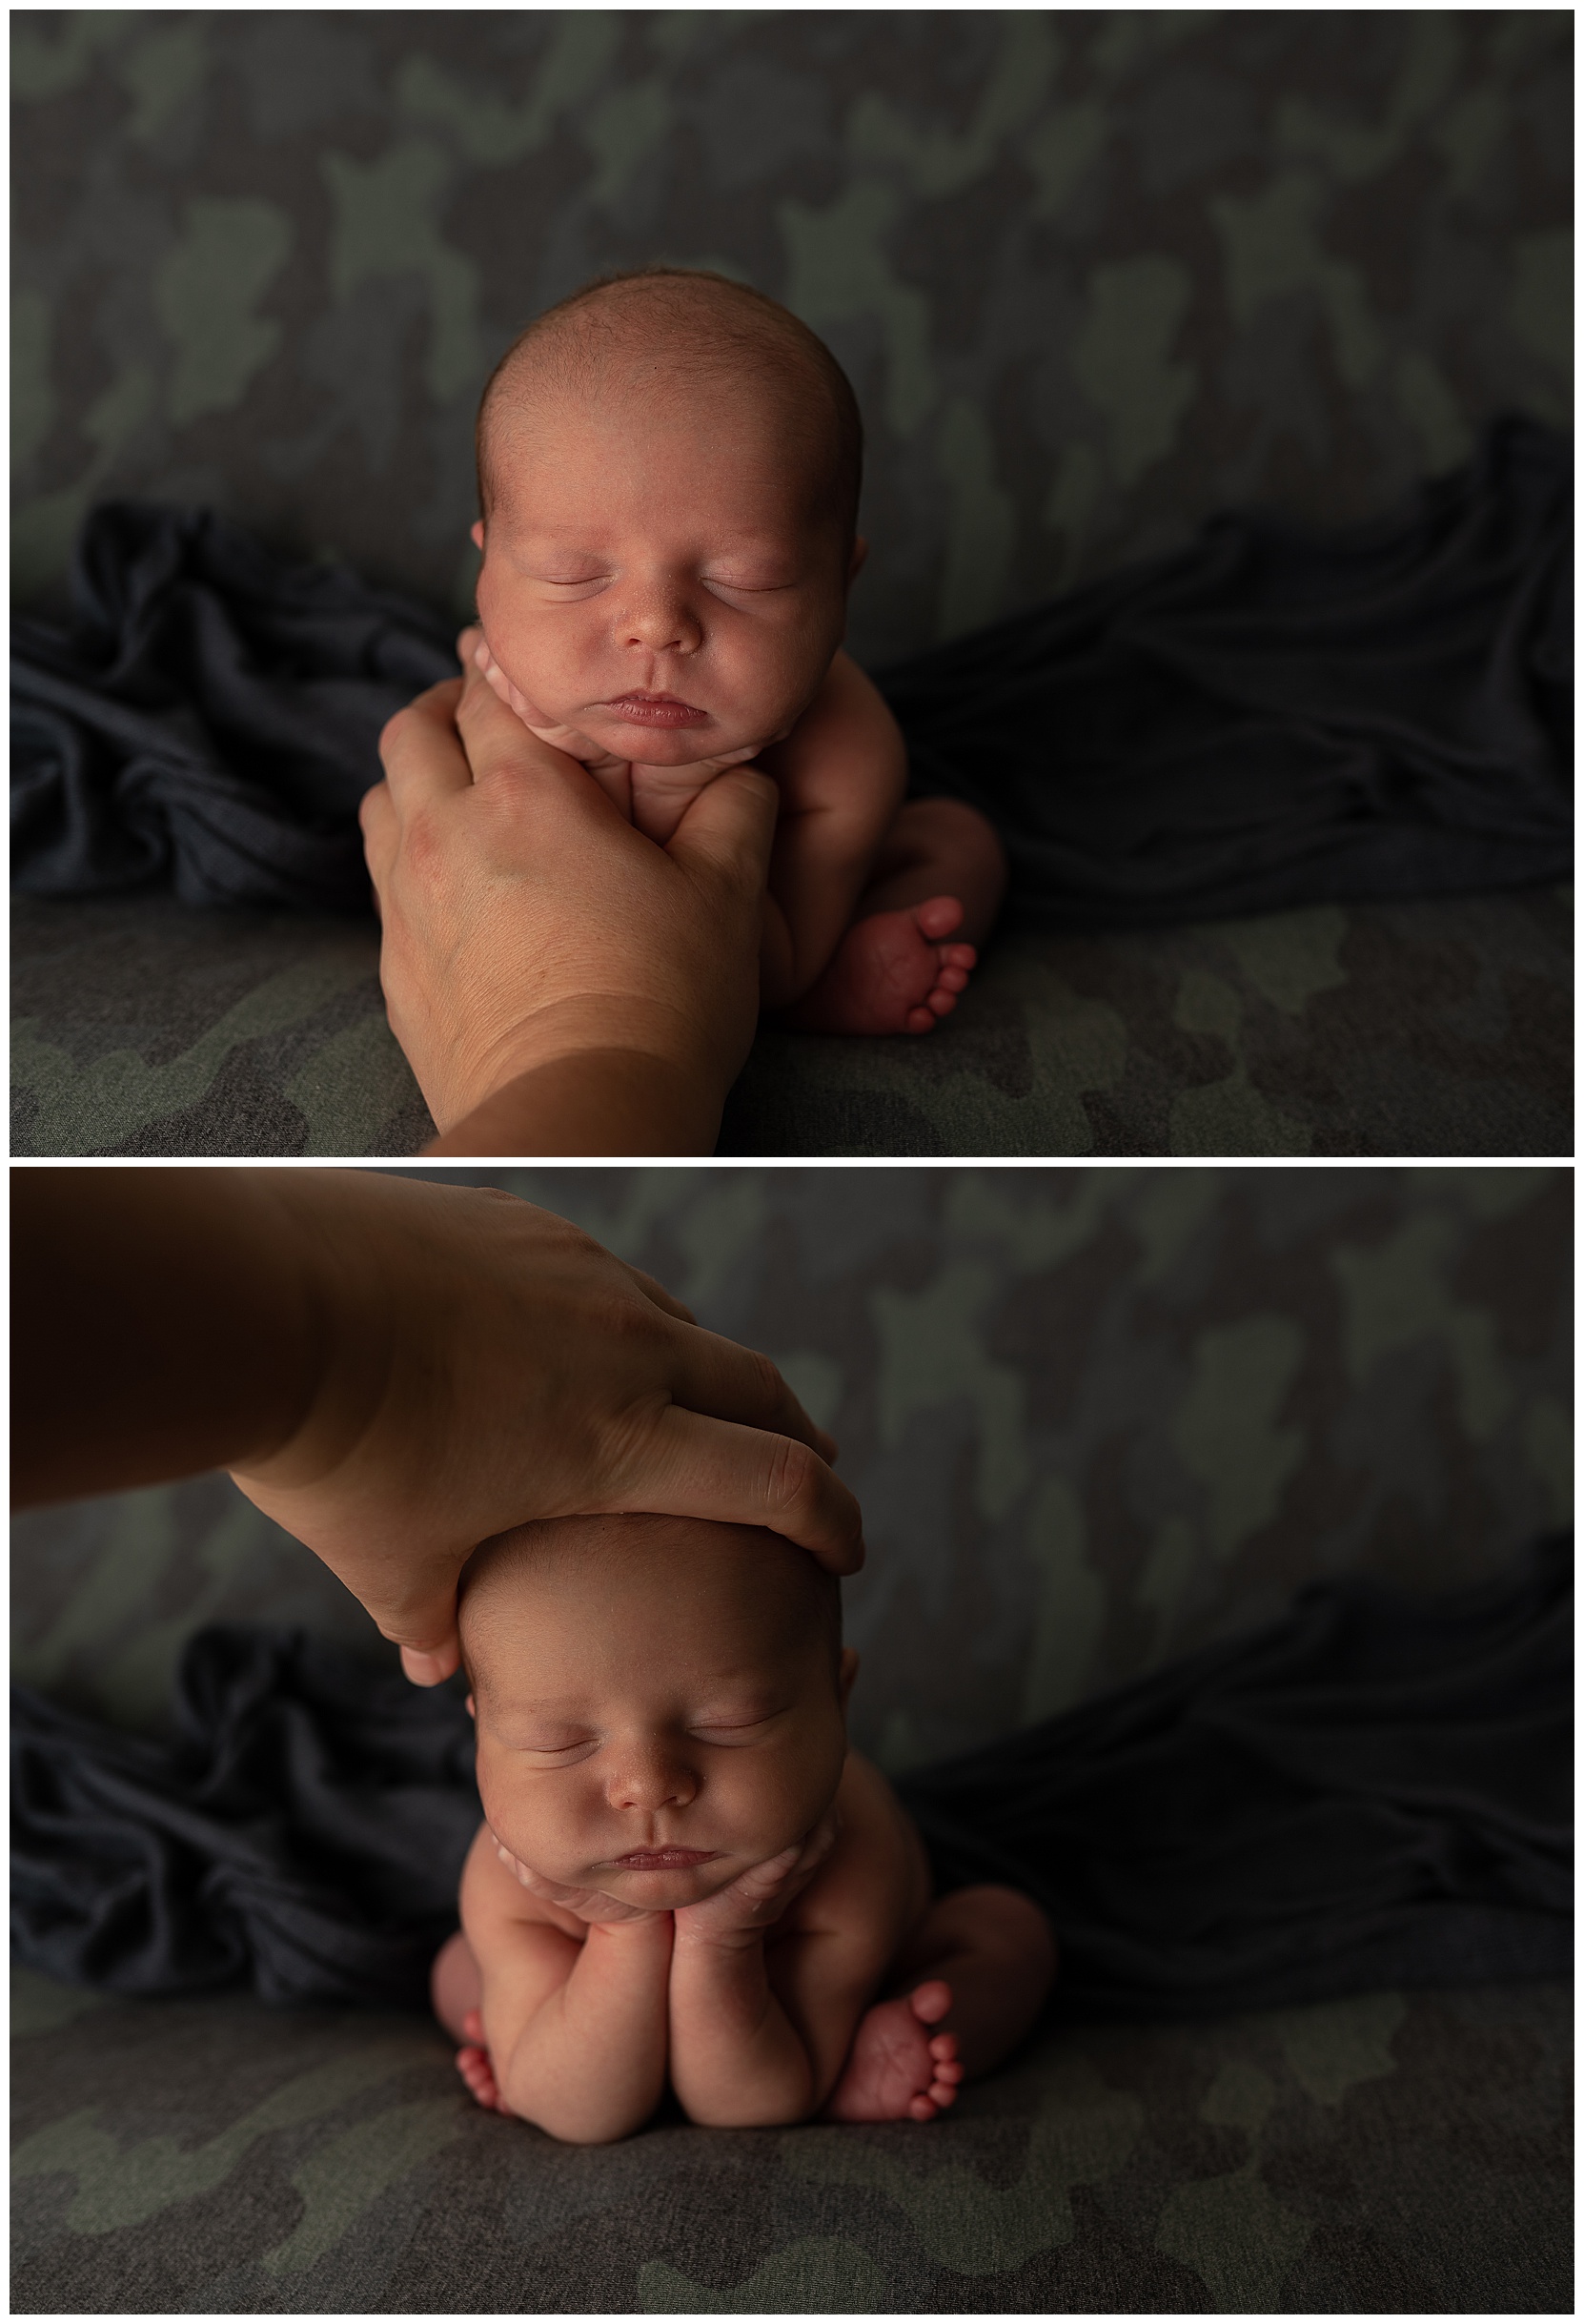
First, we make sure that the baby’s fingers are out against the sides of their cheeks. Not all babies allow you to do this. Newborns have surprisingly strong little grips. Their fingers help support their head, but they also look adorable. It was a bit of a struggle to accomplish this with this little guy:
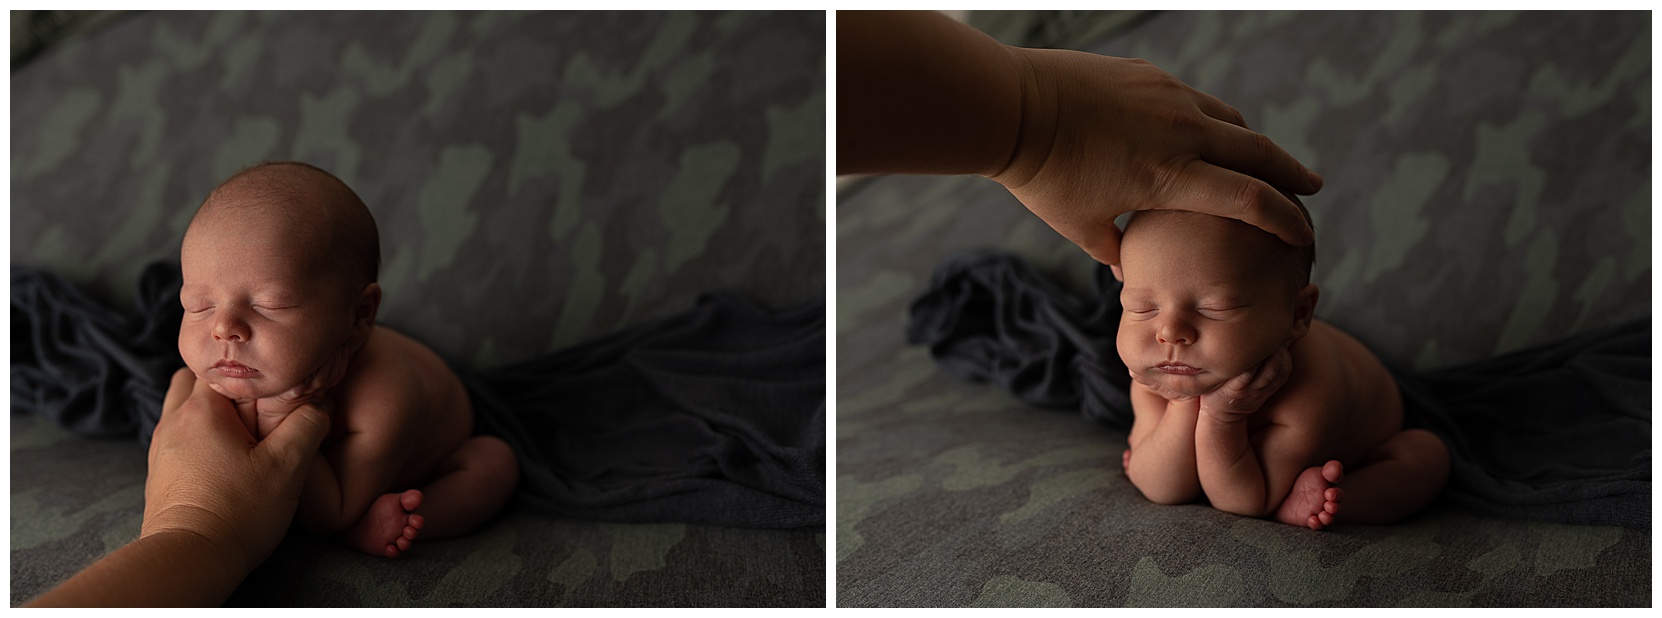
But we made it work in both versions of this shot!
Froggy pose can also be taken from the side to provide some dramatic backlighting for baby. I loved the way the lighting turned out in this side photo:
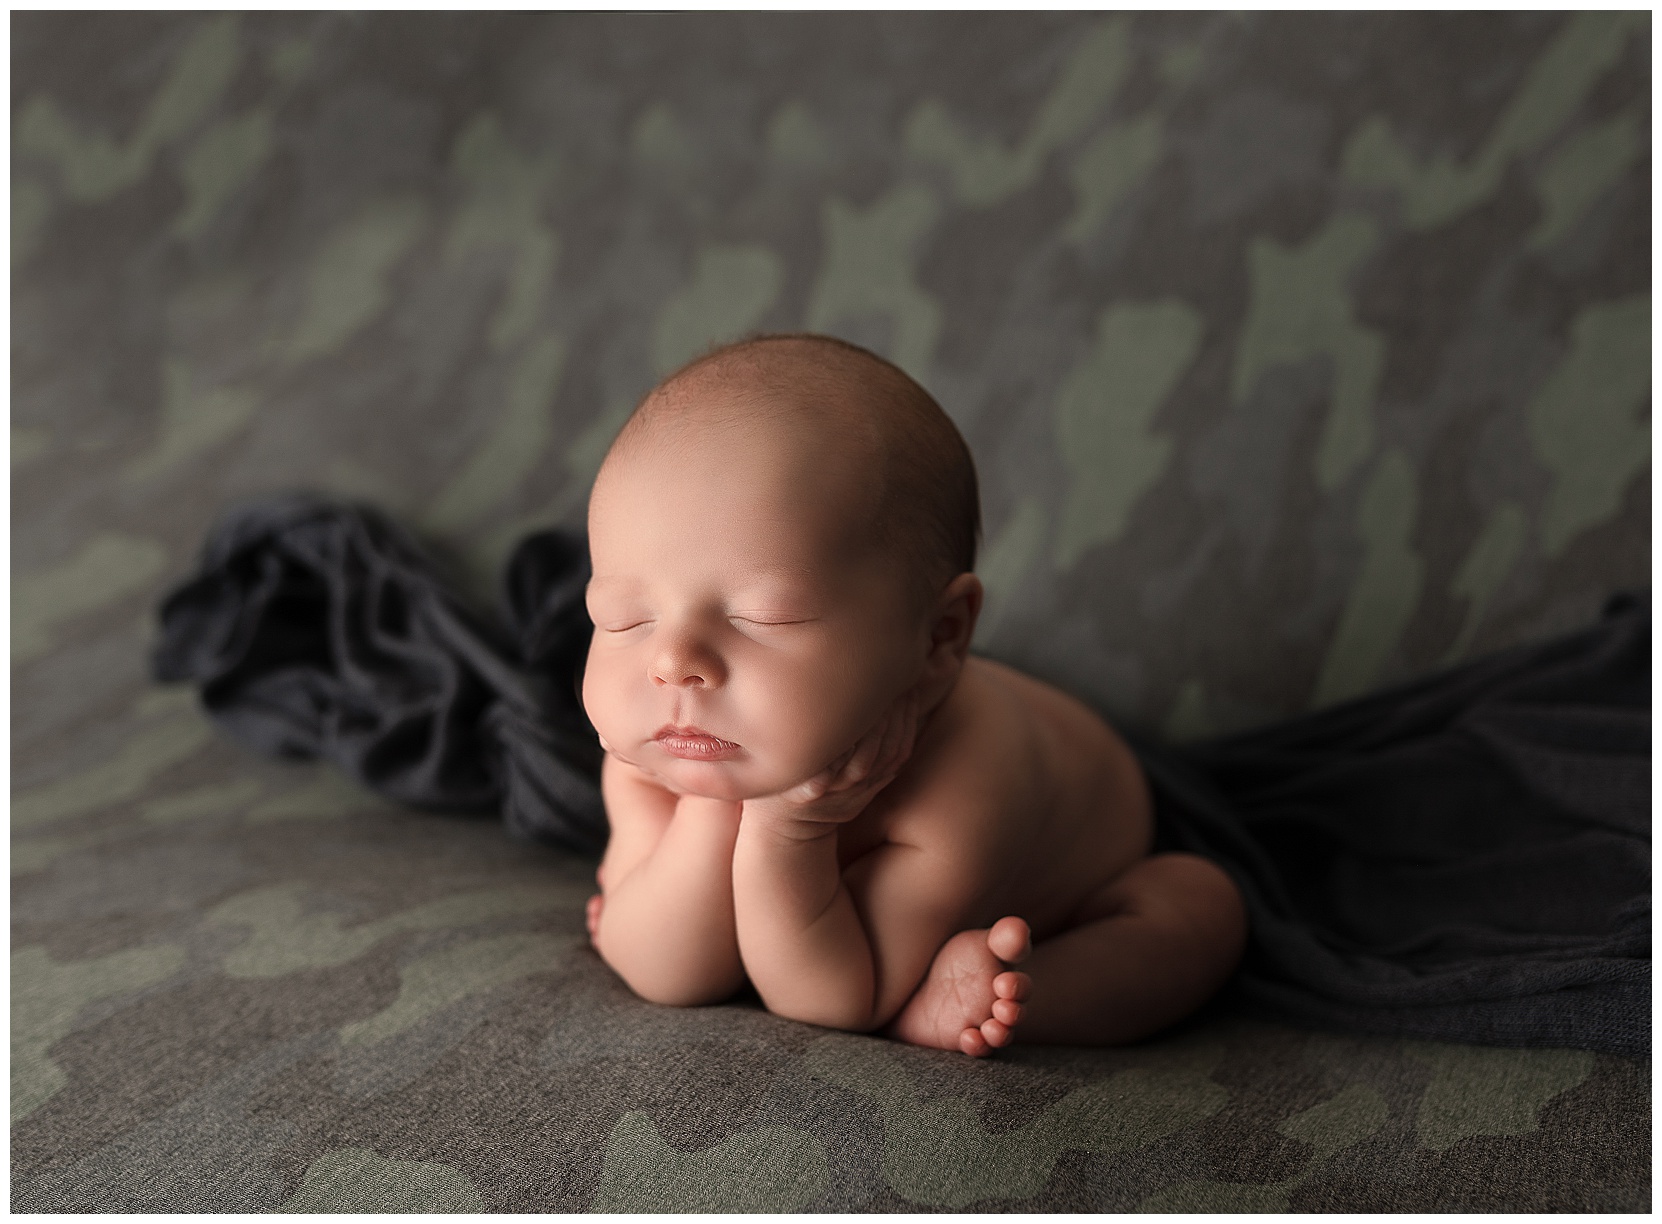
I was also able to get some stunning lighting from his final composite photo in the first head-on shots I took of him:
Here’s a step by step of his photo edits for his front- and side-facing photos. I am really pleased with the way these came out. I hope you enjoy!
Common Questions About the Newborn Froggy Pose
Is the newborn froggy pose safe?
Yes, because baby never actually holds that position alone. My hands are on your baby for every second of it. What you see in the finished image is two photos blended together, so the version where nobody is supporting him has never existed outside of Photoshop. Any photographer who poses a newborn this way without composite work is doing it wrong.
Is the froggy pose one photo or two?
Two, sometimes more. I support the bottom half and shoot the head, then support the head and shoot the bottom half, then blend them. The video above walks through exactly how I put the two halves together.
What age is best for the froggy pose?
The first two weeks. Babies are still curled and sleepy then, and the pose depends on both. After that their arms and legs straighten out and the position stops being comfortable, which means we skip it. Timing details are here.
Can every baby do the froggy pose?
No, and I am fine with that. Some babies have strong grips and will not let me tuck their fingers up against their cheeks. Some do not want their chin down. Reflux, a rough night, or a baby who simply says no all end the same way, which is that we move to another pose and get something beautiful anyway. Your baby’s comfort outranks my shot list every time.
Do you need a parent’s help for the pose?
Usually no. I set up the supports and run the pose on my own. When I do need a second pair of hands, I ask dad first, because babies can smell mom and a sleeping baby who catches that scent tends to wake up hungry.
Where can I book a froggy pose session in Austin?
Right here at the Cedar Park studio, where I have the lighting, the supports, and the safety setup this pose needs. Send me your due date and we will hold a window near your due week.
Let’s make studio newborn photography magic happen! Set up a newborn session with me today. Get started with Hello Photography.


